Home

Basic Knotwork Topics
Advanced Knotwork
Other Subjects
Bibliography/Sources
Sample Grids
|
Home |
|
Basic Knotwork Topics |
Advanced Knotwork |
Other Subjects |
|||
|
Bibliography/Sources |
Sample Grids |
The most basic rule of interlacing is: "First under then over then under then..."
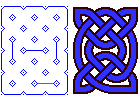
Some early documented construction techniques (see [BainG]) involved drawing lines, then creating ribbon-like bands around these lines, and then erasing the interlaced areas. Later construction techniques (see [van Stone], [Sherb], and [BainI]) involve generating a grid of cells using points laid out like "dice 5", and only drawing the lines needed, with little or no erasing required. From evidence on the manuscripts themselves (see [Hull] for details) this appears similar to the actual techniques used by the orignal Insular Celtic scribes.
 |
One "cell". |
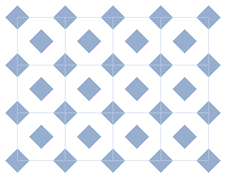 |
These cells are repeated and grouped to give a "grid" (in this case of 3 cells by 2 cells) of dots, circles, or diamonds. That is, the dots, small circles or diamond shapes are drawn to provide guidelines for the knotwork bands. The following table provides pros and cons for using the different pattern layout variations: |
PROS: |
CONS: | |
Dots: |
Quick and authentic, little or no erasing required |
Harder to keep constant band with |
Small Circles: |
Easier to keep constant band width, and easier to hand draw |
Some erasing may be required in corners and along walls |
Diamonds: |
Most accurate and consistent band width |
Hard to hand draw (but easy on the computer), and will always require some erasing |
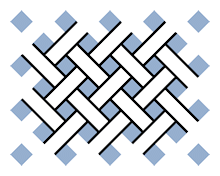
Bands are drawn at 45° to the original grid, between but not touching the dots. If bubbles (small circles) or diamonds are used, then the edges touch the edges of the circles/diamonds. The bands "bounce" or "turn" off the edges and corners of the grid (referred to as the "walls" in this tutorial). Please see the example below:
 |
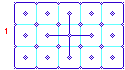
1. Build grid (example uses 3 cells by 4 cells and uses diamond shapes to mark the centers of the grid points). |
 |
2. Draw 2 parallel lines starting at the edges of the circles, diamonds (or just off the dots), not the centers. Think of bands of ribbon placed between pegs. |
 |
3. Now draw the perpendicular bands on either end... |
 |
4. ...and bands running "under" the middle of the original band... |
 |
5. ...then continue with all bands until you run into a "wall" or corner. |
 |
6. For now, just "square off" the corners and wall turns (we'll get into curving these later). |
 |
7. Finally, fill in the background with black to cover the dot/circle/diamond layout markers. |
Please attempt this interlace on your own. Download one of the the sample grids, and work with it as is, or print and use behind plain paper as calligraphy guides are used.
Most examples from actual documents use curved lines, not the angular corners we've done so far. Doing curves requires thinking ahead in the corners and walls. To get a smooth curve into the corner and against walls, you need to start back from the edge of the line that will hit the wall. Then smoothly curve the lines into the corners and walls. Try to keep the band a constant width, even though you may overrun the circles (or diamonds) in the centers of the cells. You'll see many examples of curved knotwork designs in the remainder of these instructions.
 |
1. Start with the initial example, at step 5. |
 |
2. Smoothly curve the lines into the corners and walls, overlapping cell boundaries as needed. The new curves are shown in red. |
 |
3. Clean up any stray marks "inside" the lace, and fill in the background with black as before. |
 |
An annimation of the curved interlace example can be seen by selecting the image on the left. |
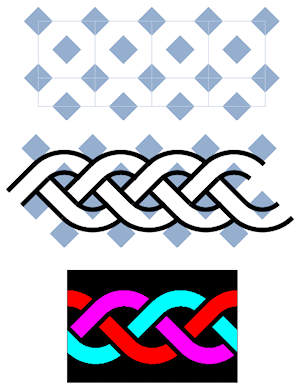
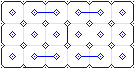
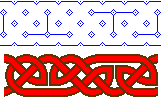
A row of cells can be used to form a border. The simplest version is one cell wide. The example below shows the grid, a section of the plait, and the same section filled in:
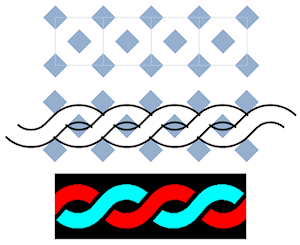
As the colors show, it uses two bands to form the border, which repeats every two cells.
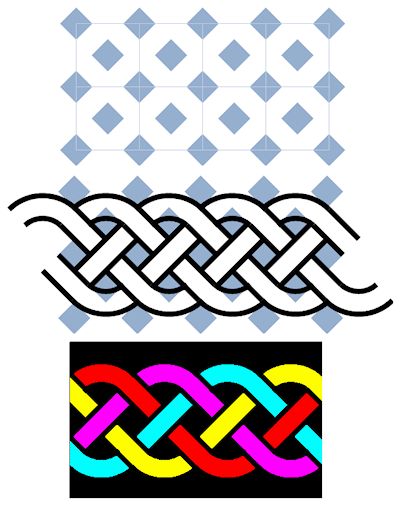
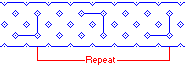
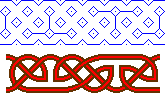
A border "1 and 1/2" cells wide uses three bands, as shown by the colored example below:
This type of border is uses as a basis for a number of Celtic knots, as will be seen in some of the examples. It repeats every three cells.
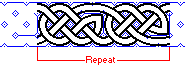
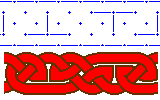
A 2-cell wide border (often used in Celtic work) is initially four separate bands, repeating every four cells:
Please note that all these plaits are constructed in the same way as the simple interlacing example, except they have no "corners", just "walls".
Celtic artists usually devised patterns in single bands where possible. How was this done?
We see that Celtic knotwork panels (and even whole pages or the sides of carved stones) are often designed to be formed from a single band. For simple interlaces, this only works when the ratio of the number of cell sides has no common factors (for example, in 2 cell X 3 cell templates, 3X4, 5X3, etc. ).
 |
An interlaced 2 cell by 3 cell panel generates a single band. |
 |
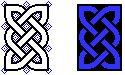
A 2 cell by 2 cell panel, when simply interlaced, results in 2 bands. |
 |
The same 2 cell by 2 cell panel, with one added wall, results in 1 band. The first part shows the 2x2 cell grid with the additional "wall" added. The second part shows the band generated by this template with the same rules and methods used in basic interlacing--over and under, changing direction ("turning", or "bouncing off") at walls and in corners. The third shows the band filled in with color. |
The trick is: knowing how to add the "walls" into the panel patterns to end up with a single band in the end.
Most Celtic knotwork designs can be seen either as connected panels (with a side partially removed) or interrupted borders (with extra walls and corners); the two concepts are very similar. The class descriptions use the "panel grid with added walls" interpretation. The original Celtic designers used these breaks and interruptions to develop their striking patterns. They often broke down long rows of border cells into areas like the 2X3 panel above, making designs that cover whole pages (or the sides of standing stones) using one long connected band.
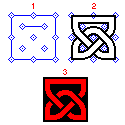
The following example knot is taken from [BainI], pg. 43, using a pattern found in Lindisfarne, especially on Folio 27:
 |
1. It is formed on a 3X5 cell grid with additional cross- shaped walls forming four new corners. |
 |
2. The bands are generated in the same way as for simple interlaced panels, "turning" at corners and walls. |
 |
3. The bands can then be colored in, as with the other panels. For other ways of treating bands, see the section on Line Treatments |
This pattern can be expanded into a border (as in the border pattern below)as well as a panel filling pattern (see the associated Celtic Computer Art pages).
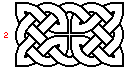
The second example knot panel is also taken from [BainI], pg. 107, using a pattern taken from Lindisfarne, folios 27, 95, and 211:
 |
1. It is formed on a 3X6 cell grid with five additional walls. |
 |
2. The bands are generated in the same way as for simple interlaced panels, "turning" at corners and walls, whether the original panel walls or the added walls. A new feature used here is the longer curve used above the short added wall. Note that the radius of this curve is made to fit "over" the shorter curve--it is not simply two short curves with a straight section between. For a better description of these curve types, see [BainI], Chapter 3. |
 |
3. The bands can then be colored in, as with the other panels. |
This pattern was originally used as a border and was designed to be "mitred" to fit around corners. See the section in the ADvanced Class Page on Mitred Corners for more information.
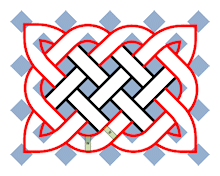
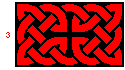
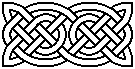
The third example knot is a border pattern taken from [BainG], pg. 40 plate E, originally from Kells:
 |
1. The basic pattern is 2 cells wide, repeating every 6 cells, using four additional walls to make two extra unconnected corners. |
 |
2. The bands are generated in the same way as for simple interlaced panels, "turning" at corners and walls, whether the original panel walls or the added walls. This pattern also uses longer curve used above the short added wall. |
 |
3. The bands can then be colored in, as with the other panels. |
To this point we've been simply using black to cover up the construction marks (dots, circles, or diamonds at the grid points) and filling in the bands with colors. The Celtic scribes certainly used this technique in the original manuscripts. They also used many other techniques to decorate the bands. Some of these are covered below.
Try increasing the circle diameters/diamond widths without changing the grid spacing to construct thinner bands, and making smaller circles/diamonds to help get wider bands.
 |
This pattern is from [Meehan2], originally from Durrow. Here is the original grid size, and a band generated using this template. |
 |
Here is a grid with larger diamonds generating a narrower band. |
 |
This grid uses smaller diamonds and, consequently, wider bands. Note that some spaces between bands disappear with wider band widths. Sometimes the bands will need to be adjusted to compensate for this effect. |
Besides changing the width, bands themselves were often decorated.
The band edges were often drawn in black, letting the background parchment show through. | |
Bands often had lines or dots running down the middle... | |
...or two narrow bands running on the sides of the band. | |
Finally, the knots were sometimes simply drawn with red dots alone against the parchment. |
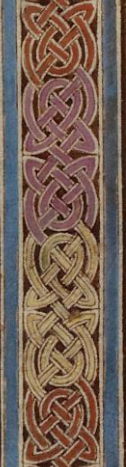
Celtic work was incredibly colorful. Some knots were light on dark (as most of the examples), but some were dark on light backgrounds. Colored areas were used on the bands and in the middle areas (between the bands) as well. Even if a band was continuous, often more than one color was applied.
Some samples are shown below:
 |
 |
 |
Aim for "interesting" work; make it pleasing to your eye. Study existing Celtic knotwork (see the references from the class Bibliography) and attempt to reflect similar themes and overall designs (e.g., try for a single band running through the entire panel/border...) Watch out for "loops", and try to get "knots" instead.
 |
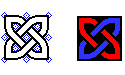
Example of a pattern with a "loop". The left shows the underlying grid (3X4 in this case) and the right shows the bands. The "loop" generated is shown in red. |
 |
Similar pattern modified to make a "knot". The left shows the added "wall" (highlighted). The right side shows the drawn and colored band, with the loop removed. |
One way to begin - and my favorite method for doodling during meetings :-) - is to sketch the underlying cell patterns and interruptions using graph paper. I then use the "bubble" technique (see Basic Interlacing Construction above) to regularize the band width, then draw out the interlace by eye. This allows a quick review of the pattern, and allows me to remove obvious loops and clumsy areas of the pattern before formally drawing it out.