Spiral patterns are on of the earliest Celtic motifs used. As shown in
[Meehan5] (note that all secondary source documents are listed by author in
square brackets, with the full text found on the
Class Bibliography page), spirals have been used since Neolithic times!
And, by the early Celtic period (500-350 BC), spirals are known as one of the
identifying motifs of that style. Spirals continued to be popular,
integrated with other artistic influences and motifs, through the entire
high Insular-Celtic period.
Clip art materials using spiral motifs are divided into the following
categories:
These images include both horizontal separator "lines" and vertical
backgrounds with left-hand borders. Please click on the bordered thumbnails
to see the full-size images.
Where possible, the components of the borders are provided. That is, the
left edge, the center (middle) repeated section, and the right edge are
provided as separate files. These may be combined to make borders of any
size desired.
1. |
|
2. |
|
3. |
|
4. |
|
5. |
|
6. |
|
7. |
|
8. |
This pattern is from an unknown folio of the Book of
Kells, but I found it in [BainG] page 65, Plate 10 (2nd from the
top right side). The tiles below are rendered in simple gray-scale.
|
a.  b.
b.
| |
9. |
|
10. |
This pattern from the Book of Kells was found in
[BainG] page 65, 2nd from the top pattern on Plate 9. A border
version of this design is found in Border 2 above. It is interesting
to compare this with the design in Tile 3 above from the Ardagh
Chalice. The tiles below are rendered in simple gray-scale.
|
a.  b.
b. 
| |
11. |
This pattern from the Book of Kells was found in
[BainG] page 62, top of Plate 4. The tiles below are rendered in
simple gray-scale and "gold jewelry". |
a. 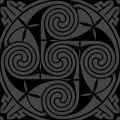 b.
b. 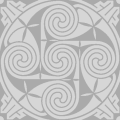 c.
c. 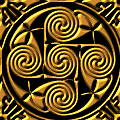
| |
12. |
This pattern from the Book of Kells (unknown folio)
can be found in [BainG] page 65, 3rd from the top pattern on Plate 9.
I tweaked the pattern in Tile 12.c to make it space filling rather than
a simple border fill. The tiles below are rendered in simple gray-scale
and "carved stone". |
a.  b.
b.  c.
c. 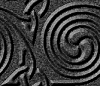
| |
13. |
This pattern from a roundel in the Book of Durrow Folio
3v, and can be found in [BainG] page 60, Plate M. I tweaked the pattern
to make it into a space filling repeat. The tiles below are rendered in
simple gray-scale and "gold jewelry". |
a. 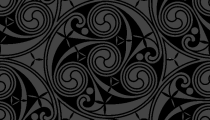 b.
b.  c.
c. 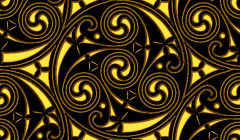
| |
14. |
|
15. |
The tiles in this section are based on a design I found in
[Meehan5] page 141, figure 88, originally from the Hitchin Hanging
Bowl. I tweaked the pattern to make it into a space filling
repeat. The tiles below are rendered in simple gray-scale. |
a. 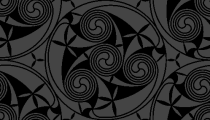 b.
b. 
| |
16. |
These tiles are based on a design I found in
[Meehan5] page 142, figure 89, originally from the Gracey Chalice.
I tweaked the pattern to make it into a space filling repeat. The tiles
below are rendered in simple gray-scale and "gold jewelry". |
a.  b.
b.  c.
c. 
| |
17. |
These tiles are based on a design the Book of Kells,
folio 28v. I did the analysis and subsequently tweaked the pattern to
make it into a space filling repeat. The tiles below are rendered in
simple gray-scale. |
a. 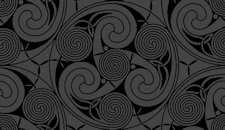 b.
b. 
| |
18. |
These tiles are based on a design the Book of Kells,
folio 32v. I did the analysis, then found that G. Bain had already done
it! See [BainG] pg. 66, bottom of Plate 12. The tiles below are
rendered in simple gray-scale. |
a. 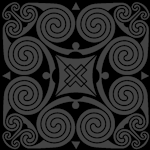 b.
b. 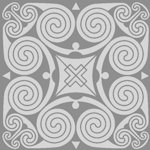
| |
19. |
These tiles are an original design, but are inspired (like
Tiles 6 and 7 above) by patterns using spirals of different radius,
like those found on the Tarbat Stone and described in [BainG]
page 67. They are rendered in simple shades of gray. |
a.  b.
b. 
| |


 b.
b.  c.
c. 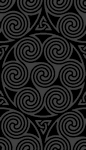 d.
d. 
 b.
b.  c.
c.  d.
d. 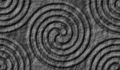 e.
e. 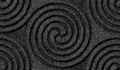 f.
f.  g.
g.  h.
h.  i.
i.  j.
j.  k.
k.  l.
l. 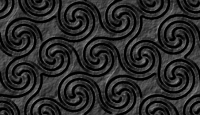 m.
m. 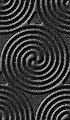 n.
n.  p.
p.  v.
v.  w.
w.  x.
x. 
 b.
b.  c.
c.  d.
d.  e.
e. 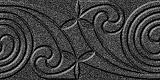 f.
f. 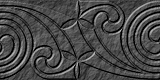
 b.
b.  c.
c.  d.
d.  e.
e. 
 g.
g. 
 b.
b.  c.
c. 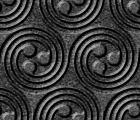 e.
e.